 Welcome to WAPTO!
This section explains how to set up and run the Wapto frontend built with Next.js. The frontend connects with the backend API topower messaging, media sharing, user profiles, groups, and real-time communication features such as voice and video calling.
Step 1: Get the source
1. Open the Wapto-frontend folder from your Wapto package
Use the Wapto-frontend directory from your release bundle or deployment copy.
- cd Wapto-frontend
This folder contains the complete Next.js project, including UI components, pages, assets, and configuration files.
Step 2: Install Dependencies
Install all required packages for the React Vite frontend:
- npm install
This will install all dependencies including Next.js, Socket.IO client, and other required packages.
Step 3: Frontend Environment Settings:
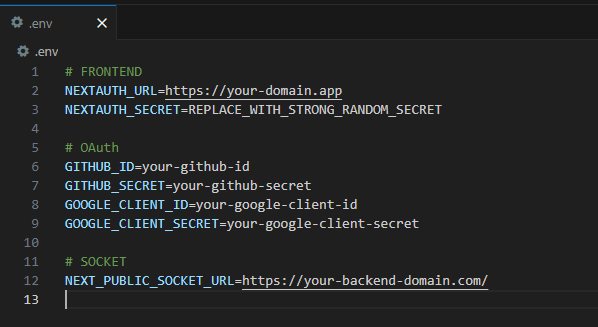
Open the .env file and update the URLs according to your domain settings.
Note:Replace your-domain.com with your actual domain or subdomain. Apply the same change for the backend API domain.
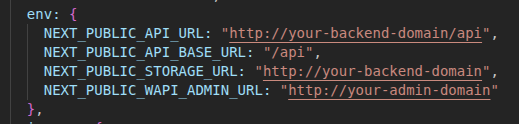
Next Config Settings:
Open the next.config.js file and update the environment variables.
- npm run build
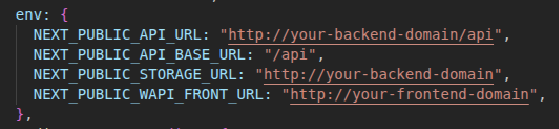
Step 4: Admin Environment Settings:
Open the next.config.js file in the Wapto-admin directory and update the
environment variables.
next.config.js, you must rebuild the admin project:
- npm run build
.env file, Next.js reads values from
next.config.js at build time. Restarting alone will not apply changes.
Step 5: Start the Frontend & Admin
For development:
- npm run dev
The frontend will start in development mode, and you can access it in your browser at the URL shown in the terminal.
Step 6: Verify Frontend Installation
Open your browser.
Navigate to the frontend and admin URL (e.g., http://localhost:port).
Ensure the frontend and admin loads successfully and is able to communicate with the backend API and Socket.IO server.
If you encounter issues, verify that the backend API is running, .env variables are correct, and ports are accessible.
npm run build to generate the production build.
Note : All frontend dependencies including Socket.IO client are installed automatically with npm install` .
-- The .env file is critical to ensure that the frontend connects properly to the backend API, real-time server, and storage.
-- For production deployment, make sure the URLs point to your live server endpoints.
What's Next?
Let’s get started — your team’s new home is Wapto Chat!