 Welcome to WAPTO!
Get an AI summary of this page
SECTION 3: Required Permission
You must have:
- Manage WhatsApp account permission
Note: If you are the owner of the WhatsApp Business Account, you already have this permission.
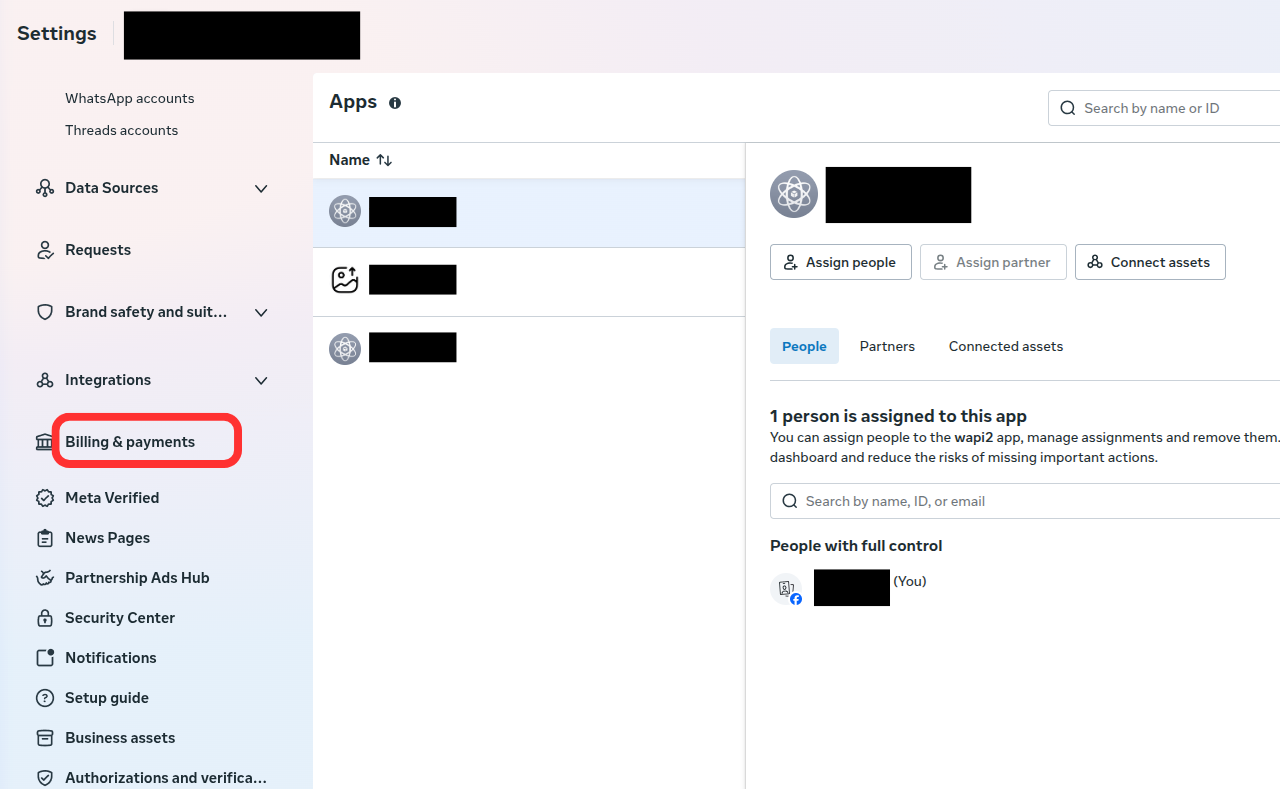
SECTION 4: Add Credit Card (Step-by-Step)
- Open WhatsApp Manager.
- Go to Overview page.
- Select your account.
- Click the 3-dot menu.
- Click Manage account settings.
- Open Settings tab.
- Click Payment settings.
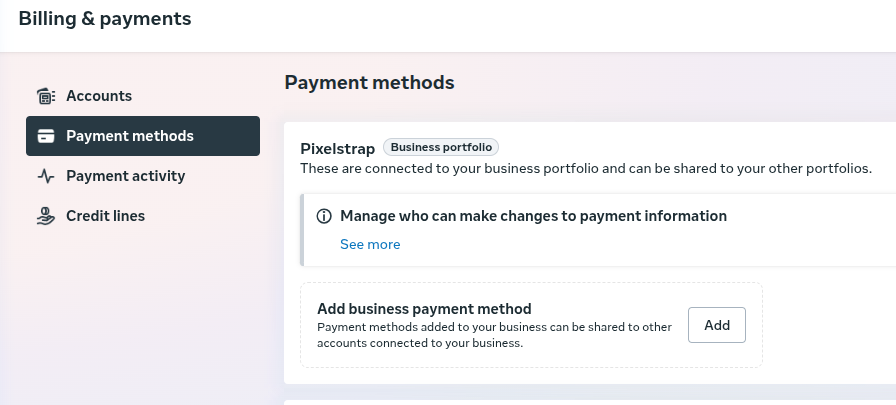
- In Billing & Payments, click Add payment method.
- Follow instructions:
- Add payment details.
- Click Next.
- Enter card details → Click Save.
- Add business information → Click Save.
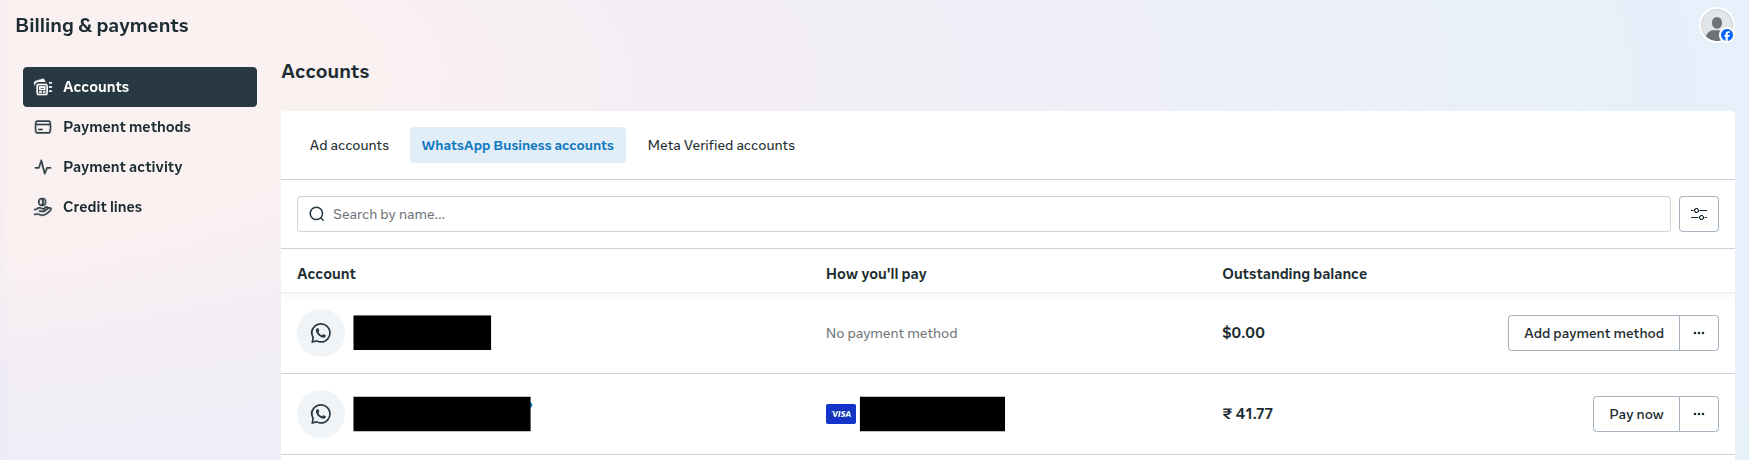
- Go to account
- The billing section displays the total outstanding balance associated with your account.
SECTION 5: After Adding Payment Method
- Credit card will be linked to your WhatsApp Business Account.
- You can view it in: Settings → Payment settings.
SECTION 6: How Charges Are Applied
- Charges are NOT applied immediately.
- Billing is based on:
- Template message usage
- Pricing category
Charges will be calculated as per Meta pricing (Marketing, Utility, Authentication categories).
SECTION 7: Important Restriction
Without adding a payment method, you cannot:
- Send template messages.
- Start business-initiated conversations.
- Use marketing, utility, or authentication messages.
Your account may remain:
- Restricted
- In test mode
SECTION 8: Common Issues
- Payment option not visible → setup not completed.
- Permission missing → cannot add card.
- Payment failed → messages may stop.
SECTION 9: Best Practices
- Add payment method before going live.
- Keep backup payment method.
- Monitor billing usage regularly.
- Verify business account.